
A dripping faucet is the plumbing problem people live with longest. It is not an emergency, nothing is flooding, and the noise fades into the background after a week or two. So it sits there, dripping, sometimes for years.
The water adds up more than people expect. A steady drip you can count at one per second works out to somewhere around twenty litres a day. On a metered supply that is money. On a water heater it is worse, because a dripping hot tap is pulling heated water out of the tank and quietly reheating it around the clock.
The good news is that most drips come from one small worn part, and replacing it is genuinely within reach for anyone willing to spend an hour on it. Here is what is actually failing, and how to tell the repairs apart from the ones that are not worth doing.
First, work out where it is dripping from
This matters more than it sounds, because three different faults get described as “a dripping tap” and only one of them is fixed the way this article describes.
Water dripping from the spout when the tap is off is a valve problem. Something inside the tap that is supposed to seal is no longer sealing. That is the common case and the one covered below.
Water appearing around the base of the spout when the tap is running is usually a worn O-ring where the spout swivels. Different part, similar job, and it only shows up while the water is on.
Water underneath, in the cupboard, is not a faucet fault at all in most cases. It is the supply connections, the shut-off valves, or the drain trap. A tap can be bone dry above the counter and soaking the cupboard below. Check with a dry paper towel before you take anything apart.
Why taps drip
Inside every tap is something that presses a soft surface against a hard one to stop the flow. The soft part wears out. That is essentially the whole story.
Which soft part depends on what kind of tap you have, and there are four common types:
Compression taps have separate hot and cold handles that keep turning as you tighten them. These use a rubber washer that gets squashed against a brass seat every time you close the tap. The washer flattens, hardens and eventually stops sealing. Oldest design, easiest repair, cheapest parts.
Cartridge taps may have one handle or two, but the handle stops at a definite point rather than tightening indefinitely. Inside is a replaceable cartridge. When it drips, you swap the cartridge rather than any individual washer.
Ball taps are the single-lever kitchen style with a rounded body under the handle. They contain a slotted ball plus springs and rubber seats. Rebuild kits exist and work, but there are more small parts to lose down the drain than in any other type.
Ceramic disc taps use two polished ceramic discs that slide across each other. These last a long time. When they do fail it is usually because grit has scratched a disc, and the cartridge gets replaced as a unit.
If you cannot tell which you have, the handle behaviour is the quickest clue. A handle that keeps turning and tightening is compression. A handle that moves through a fixed arc and stops is one of the other three.
The repair, step by step
Turn off the water first. There should be shut-off valves under the sink, one for hot and one for cold. Turn them off and then open the tap to confirm nothing comes out. If those valves are seized, and on older installations they often are, you are turning off the main to the house instead. Worth knowing before you start rather than halfway through.
Plug the drain. A sink stopper or a rag. Every plumber has fished a tiny screw out of a trap for somebody, and it is a miserable job for a part that costs almost nothing.
Take photographs as you go. Phone, every stage, before each piece comes off. Reassembly is where most people get stuck, not disassembly.
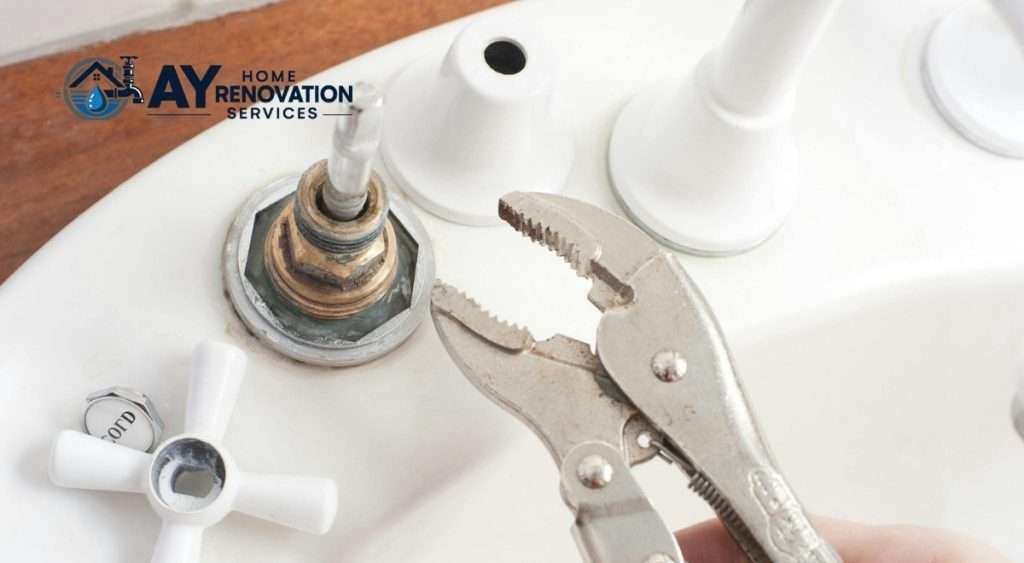
Getting the handle off. There is usually a decorative cap on top hiding a screw. Lever it up carefully with a small flathead, ideally with a strip of tape on the blade so you do not chew up the finish. Under it is a screw, often Phillips, sometimes a small hex.
On a compression tap, below the handle is a packing nut. Loosen it, lift out the stem, and the washer is on the bottom end, held by a brass screw. Swap the washer, and while you are in there feel inside the tap body where the washer seats. If it feels rough or pitted rather than smooth, that is your real problem. A seat that has corroded will chew through a new washer in months. It can be resurfaced with a seat dressing tool, or the seat itself replaced if it is the removable kind.
On a cartridge tap, there is usually a retaining clip or a threaded collar holding the cartridge down. Note which way round the cartridge sits before you pull it, because fitting it rotated will reverse your hot and cold.
Take the old part to the store with you. Not a photo of it, the actual part. Cartridges in particular vary between manufacturers in ways that are impossible to match by eye, and a universal part that is nearly right will drip again within the year.
Reassemble gently. Hand tight, then a small nudge with the wrench. Overtightening a packing nut compresses the new washer immediately and cracks plastic cartridges. Then turn the water on slowly and watch, rather than opening it fully straight away.
Where the job goes sideways
Three things turn a straightforward repair into a bad afternoon.
Seized shut-off valves. These are the small chrome valves under the sink, and the ones that have sat untouched for fifteen years often will not close, or will not close fully, or start weeping from the spindle once they have been moved. This is the single most common reason a simple tap job escalates.
A corroded fastener. The nut holding the tap to the counter sits in the most awkward spot in the house and is frequently rusted. A basin wrench helps. Penetrating oil and patience help more.
Scratched finishes. Pliers on a chrome or brushed nickel body leave marks that do not come out. Tape the jaws, or use a strap wrench.
There is also a quiet limit worth knowing: on genuinely old taps, parts may simply not be available any more. If the brand is long gone and nothing in the store matches, no amount of skill makes that repair happen.
When replacing beats repairing
Repair is the right call when the tap is reasonably modern, the body is sound, and it is the first time it has dripped. Beyond that, the maths shifts.
Replace rather than repair when:
- The same tap has been repaired before and is dripping again. The second repair usually signals a worn valve seat or a tired body, not another bad washer.
- The body is corroded, pitted or stained in a way that does not clean off.
- Parts are unavailable or the brand is unidentifiable.
- It is a two-handle unit in a kitchen where a single lever would be more useful day to day. Preference is a legitimate reason.
- There is movement in the tap when you use it. A tap that rocks has a failing mounting, and that goes on to leak under the counter.
We went into the wider list of warning signs in signs it is time to replace a faucet, which covers the cases that go beyond a simple drip.
One honest caveat on replacement: swapping a tap is not automatically easier than repairing one. If the shut-offs are seized and the mounting nuts are rusted, a replacement becomes a longer job than a washer change, not a shorter one. That is often the deciding factor in whether people call someone rather than the cost of the tap itself.
When to hand it over
Call someone if the shut-off valves will not hold, if the leak is under the sink rather than at the tap, if water is getting into the cabinet base, or if you have taken it apart and it drips worse than before it came apart.
That last one is not unusual and it is not a failure. Reassembling a tap onto a damaged seat is one of those jobs that needs the right tool rather than more effort.
If you would rather not spend the afternoon on it, we handle faucet repair and replacement in Pickering, Ajax and Whitby, including the seized shut-off valves that tend to come with it. There is a dedicated page for faucet work in Whitby if that is where you are. Call 647-248-7755 and describe what it is doing.